
Wood density is calculated by dividing a sample’s dry mass in grams by its volume in cubic centimetres. The result is given in g/cm³. Values typically range from 0.2 g/cm³ for balsa to over 1.0 g/cm³ for hardwoods such as ironwood. This article explains how to measure both dimensions accurately at home, account for moisture content, and interpret your result against standard reference values.
Key takeaways
- Check timber density before you cut. It helps predict behaviour under load and at the blade.
- Use a digital scale that reads to 0.1 g. A jeweller’s scale accurate to 0.01 g suits thin veneers.
- Dry samples fully before measuring. Moisture raises weight without reflecting actual wood structure.
- Divide dry weight in grams by volume in cubic centimetres to get density in g/cm³.
- Softwoods typically fall between 0.35 and 0.60 g/cm³. Hardwoods range from 0.55 to 1.10 g/cm³.
- Any result above 1.00 g/cm³ means the wood will sink in water.
- Cross-reference your figure against species data on the Wood Database to confirm timber identity.
Why Wood Density Matters for Woodworking and Timber Selection
Check the density of any timber before you cut or join it. This single value shows how the wood will behave under load, at the blade, and over time. Dense species like Ipe or hard maple resist denting and wear, so they suit flooring and workbench tops. Lower-density timbers such as western red cedar dry faster, hold less moisture, and accept finishes more readily, which makes them a strong fit for exterior cladding and lightweight furniture frames.
Density also helps predict how wood responds to fasteners. High-density hardwoods can split if nails are driven without pre-drilling. Very low-density softwoods may not grip screws with enough force for structural joints. Matching density to the job helps prevent premature failure.
In structural or load-bearing projects, density correlates closely with the modulus of rupture, which is the point at which a beam breaks under bending stress. Timbers below roughly 450 kg/m³ are generally unsuitable for spanning wide distances without additional support. Knowing the density before purchasing stock can save both material cost and rework.
Tools and Materials You Need Before You Start
| Task | Best tool or method | When to use it |
|---|---|---|
| Weighing standard timber samples | Digital kitchen scale to 0.1 g | Most offcuts and small blocks |
| Weighing very small pieces | Jeweller's scale to 0.01 g | Thin veneers or tiny samples where rounding errors matter |
| Measuring regular shapes | Ruler or digital calliper | Pieces with measurable length, width and thickness |
| Measuring irregular shapes | Water displacement in a graduated container | Samples that cannot be measured accurately with straight dimensions |
Accurate density figures depend on precise measurements, so gather the right equipment before you start. A digital kitchen scale that reads to 0.1 grams works for most timber samples. For small offcuts or thin veneers, a jeweller’s scale accurate to 0.01 grams removes the rounding errors that skew results.
To measure volume, use a ruler or digital calliper for regular-shaped pieces and a water container large enough to submerge irregular samples. Digital callipers from brands such as Mitutoyo read to 0.01 mm. That precision matters when a millimetre of error shifts calculated density by several percent on small samples.
Let freshly cut timber sit indoors for at least 24 hours before weighing, as moisture content affects density directly. Record each measurement at once, because a single transposed digit produces a figure unsuitable for timber selection or structural planning.
How to Measure Wood Weight and Volume Accurately
Moisture content causes most errors when measuring wood density at home. Fresh or partially dried timber contains water, which raises the weight reading without changing the actual wood structure. Dry samples in an oven or leave them in a stable indoor environment for several weeks before measurement. Kiln-dried timber from a supplier is generally ready to measure without further conditioning.
Weigh the sample on your digital scale and record the figure in grams. To find volume, measure the length, width, and thickness in centimetres with a digital calliper. Then multiply the three values together. A piece measuring 10 cm × 5 cm × 2 cm gives a volume of 100 cm³. For irregular samples, use the water displacement method. Submerge the piece fully in a graduated container and read the volume from the change in water level in millilitres, where 1 ml equals 1 cm³.
Record both figures before moving to the calculation. Even a 0.5 cm error in one dimension of a small sample can shift the final density result by several percent. Take each measurement twice and use the average.
Applying the Density Formula and Interpreting Your Results
To get density in g/cm³, divide the dry weight in grams by the volume in cubic centimetres. A sample weighing 45 g with a volume of 60 cm³ gives 0.75 g/cm³. Most softwoods fall between 0.35 and 0.60 g/cm³, while hardwoods range from 0.55 to 1.10 g/cm³. Any result above 1.00 g/cm³ means the wood will sink in water. Cross-reference your figure against published species data from the Wood Database to check whether the reading is plausible.
Inconsistent units cause the most common calculation error. If you measure volume in millimetres, convert before dividing: 1 cm³ equals 1,000 mm³. Skipping this step inflates the density figure by a factor of 1,000.
A reading well outside the expected range usually points to residual moisture rather than a calculation error. Even a small amount of absorbed moisture adds measurable weight and pushes the figure beyond the typical species range. If the density reads unusually low, check for hidden voids or cracks that reduced the effective sample volume.
Density Ranges for Common Wood Species and How to Use Them
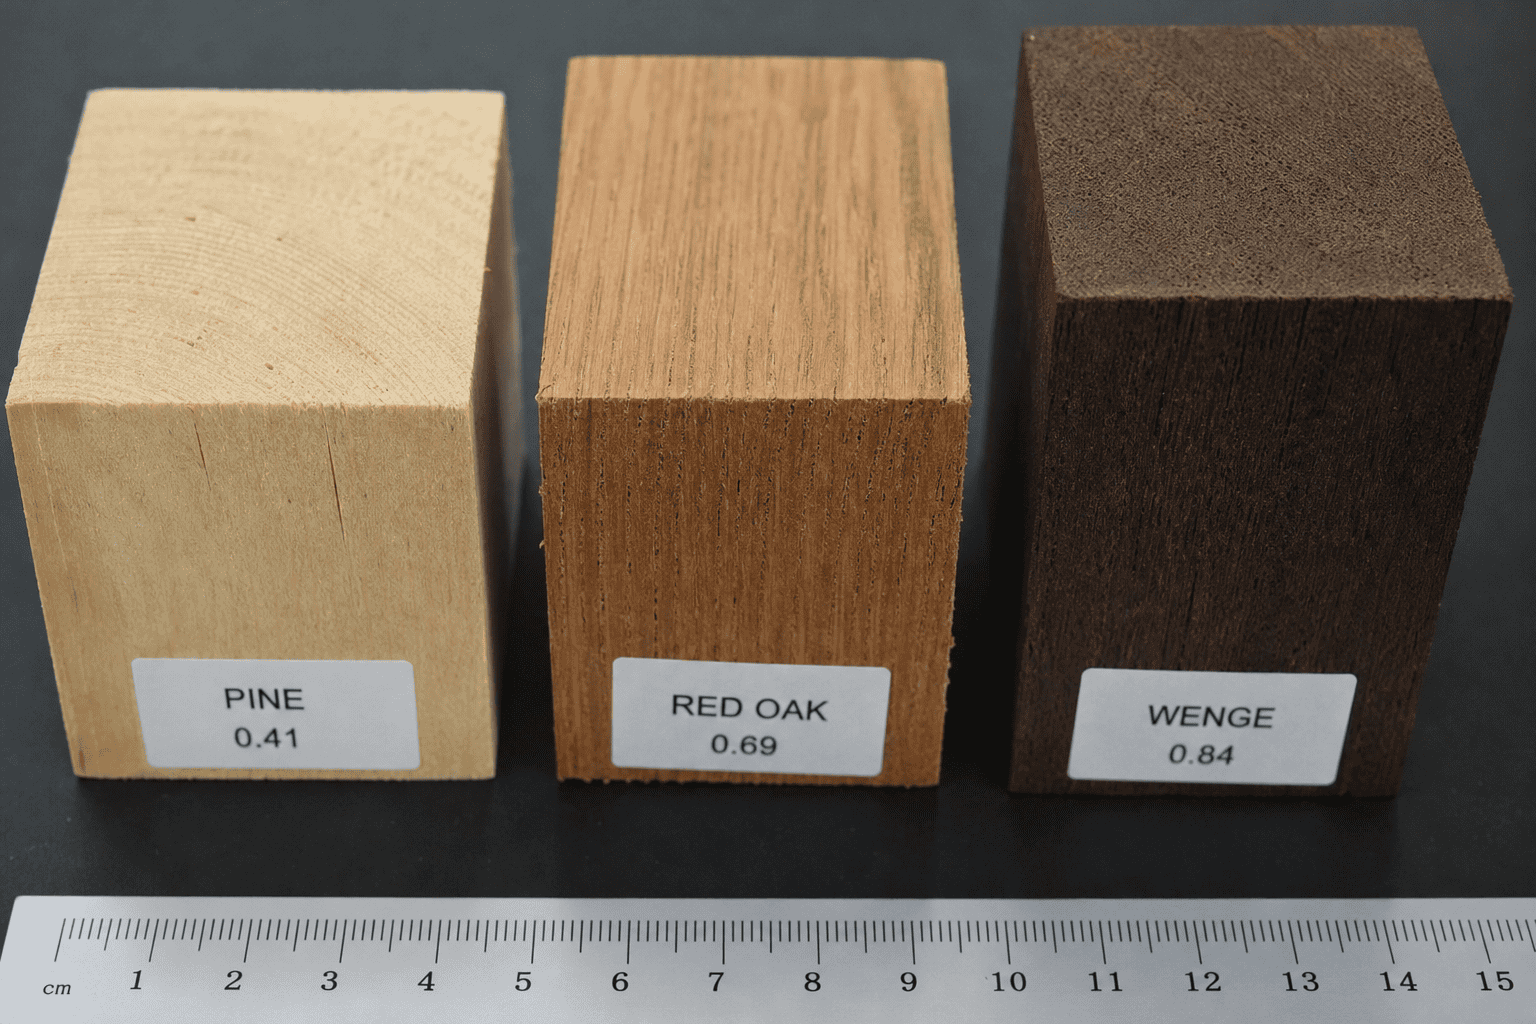
A measured density figure only becomes useful when you compare it with known species values. Balsa sits at roughly 0.12 g/cm³; Douglas fir falls between 0.45 and 0.55 g/cm³; European oak ranges from 0.60 to 0.75 g/cm³; lignum vitae reaches 1.05 to 1.35 g/cm³ and sinks in water.
Use your result to narrow down species identity in unlabelled timber. A reading between 0.65 and 0.72 g/cm³ rules out most softwoods and points to medium-density hardwoods such as ash or cherry. The Wood Database lists specific gravity values for hundreds of species, along with janka hardness and shrinkage data.
Density also helps with practical decisions. Timbers above 0.80 g/cm³ blunt cutting tools faster and require pre-drilling before fastening. Anything below 0.45 g/cm³ compresses under sustained point loads, which makes it unsuitable for legs or load-bearing rails without reinforcement.
Frequently Asked Questions
How do you calculate wood density at home using weight and volume?
Divide the wood’s weight in grams by its volume in cubic centimetres to calculate density. For regular shapes, measure volume by multiplying length, width, and height. For irregular pieces, use water displacement. The result gives you density in g/cm³, typically between 0.3 and 0.9 for most timber species.
What tools do you need to measure the weight and volume of a piece of wood accurately?
Accurate results depend on two measurements: mass and volume. Measure weight with a digital kitchen scale, accurate to at least 1 gram. Measure volume with a ruler and basic arithmetic for regular shapes. Irregular pieces need a water displacement container, such as a large measuring jug, to capture the true volume.
How do you find the volume of an irregularly shaped piece of wood?
Submerge the wood in a container of water and measure the rise in water level. Convert that rise to cubic centimetres to get the wood’s volume. If the wood floats, hold it under briefly with a thin skewer, then subtract the skewer’s own displacement.
Should wood density be measured when the wood is dry or freshly cut?
Moisture content can change wood weight significantly and distort density readings. For consistent, comparable results, measure dry wood, ideally kiln-dried or air-dried to a stable moisture content below 20%. Freshly cut green wood retains water in its cells, which inflates the apparent density well above the wood’s true structural value.
What common mistakes can affect the accuracy of a home wood density calculation?
Most inaccurate home results come from four errors: measuring green (unseasoned) wood instead of dried wood, using irregular sample shapes that distort volume calculations, weighing wood on imprecise kitchen scales, and failing to account for bark. Moisture content alone can inflate a density reading by 30% or more. Dry the sample fully, then use a digital scale accurate to at least 0.1g.